Hello, aioquic!
A simple example of using the aioquic library to implement a QUIC client and server in Python.

Overview
This project demonstrates a simple implementation of a QUIC client and server using the aioquic library in Python. The server listens for incoming QUIC connections and echoes back messages received from the client. The client connects to the server, sends a message, and prints the response.
INFO
Go version: Hello, quic-go!
Feature Highlights
- QUIC Protocol: Utilizes the QUIC protocol for low-latency, multiplexed connections.
- Asynchronous I/O: Built with
asynciofor efficient handling of multiple connections. - TLS Encryption: Uses TLS for secure communication between client and server.
- Self-signed Certificates: Generates self-signed certificates for local testing.
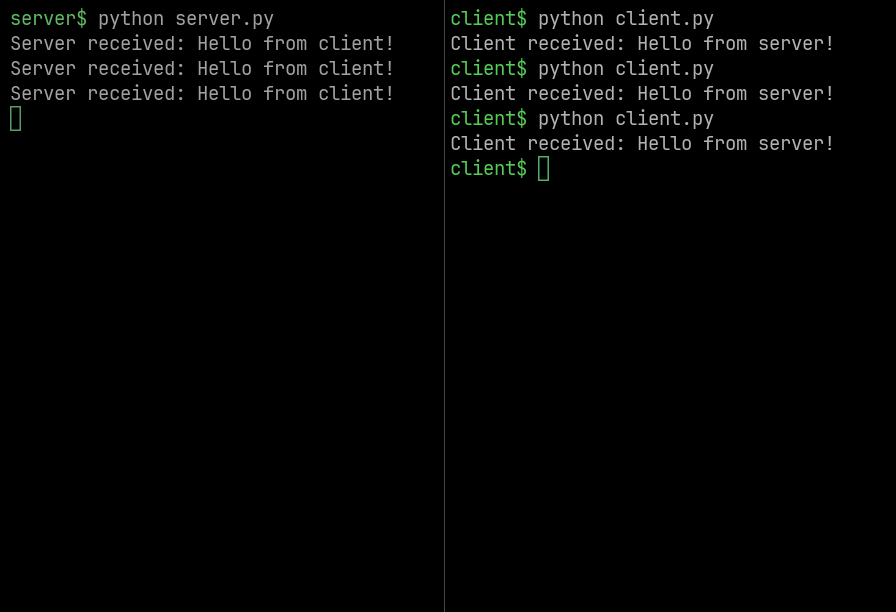
Screenshots
QUIC Client Server Communication
Use Cases
- Learning: Understand the basics of QUIC and how to implement it in Python.
- Prototyping: Quickly prototype applications that require low-latency communication.
- Testing: Test QUIC-based applications in a local environment.
Technologies Used
- Python: The programming language used to build the application.
- aioquic: A Python library for QUIC and HTTP/3.
- asyncio: Python’s built-in library for writing concurrent code using the async/await syntax.
- OpenSSL: A robust, full-featured open-source toolkit for SSL and TLS.
Environment Setup
Install Dependencies
A Python virtual environment and OpenSSL are required to be installed.
INFO
The following command is for Ubuntu and Debian-based distributions. For any other OS or Linux distribution, check the relevant documentation.
1
sudo apt install python3-venv openssl
Create Project Directory
1
2
mkdir quic-python
cd quic-python
Create and Activate Python Virtual Environment
1
2
python -m venv venv
source venv/bin/activate
Create Requirements File
Create a file named requirements.txt with the following content:
1
2
3
4
5
6
7
8
9
10
11
aioquic==1.2.0
attrs==25.3.0
certifi==2025.8.3
cryptography==45.0.6
pyasn1==0.6.1
pyasn1_modules==0.4.2
pycparser==2.22
pylsqpack==0.3.22
pyOpenSSL==25.1.0
service-identity==24.2.0
typing_extensions==4.14.1
Install Python Dependencies
1
pip install -r requirements.txt
Generate Self-Signed Certificate for Localhost
WARNING
This certificate is for local testing purposes only. For production use, a trusted Certificate Authority (CA) should be used.
1
2
3
4
5
6
7
8
9
10
openssl req \
  -new \
  -newkey rsa:2048 \
  -days 365 \
  -nodes \
  -x509 \
  -keyout key.pem \
  -out cert.pem \
  -subj "/CN=localhost" \
  -addext "subjectAltName=DNS:localhost"
Code
Create Server
Create a server file server.py with the following content:
1
2
3
4
5
6
7
8
9
10
11
12
13
14
15
16
17
18
19
20
21
22
23
24
25
26
import asyncio
from aioquic.asyncio import QuicConnectionProtocol, serve
from aioquic.quic.configuration import QuicConfiguration


# Define server protocol (how to handle messages)
class ServerProtocol(QuicConnectionProtocol):
    def quic_event_received(self, event):
        if hasattr(event, "data"):  # If data is received
            print("Server received:", event.data.decode())
            # Echo back to client
            self._quic.send_stream_data(event.stream_id, b"Hello from server!")


# Run the QUIC server
async def main():
    config = QuicConfiguration(is_client=False)
    config.load_cert_chain("cert.pem", "key.pem")  # TLS cert required

    # Listen on localhost:4433
    await serve("localhost", 4433, configuration=config, create_protocol=ServerProtocol)
    await asyncio.get_running_loop().create_future()  # Keep server running


if __name__ == "__main__":
    asyncio.run(main())
Create Client
Create a client file client.py with the following content:
1
2
3
4
5
6
7
8
9
10
11
12
13
14
15
16
17
18
19
20
21
22
23
24
25
26
27
28
29
30
import asyncio
from aioquic.asyncio import connect, QuicConnectionProtocol
from aioquic.quic.configuration import QuicConfiguration
from aioquic.quic.events import StreamDataReceived


class ClientProtocol(QuicConnectionProtocol):
    def quic_event_received(self, event):
        if isinstance(event, StreamDataReceived):
            print("Client received:", event.data.decode())


async def main():
    config = QuicConfiguration(is_client=True)
    config.verify_mode = False  # disable TLS verification for local testing
    config.load_verify_locations("cert.pem")

    # Connect to server
    async with connect(
        "localhost", 4433, configuration=config, create_protocol=ClientProtocol
    ) as client:
        stream_id = client._quic.get_next_available_stream_id()
        client._quic.send_stream_data(stream_id, b"Hello from client!")

        # Keep running for a bit to receive server reply
        await asyncio.sleep(2)


if __name__ == "__main__":
    asyncio.run(main())
Directory Structure
After creating the above files, project directory structure should look like this:
1
2
3
4
5
6
7
quic-python/
├── venv/
├── cert.pem
├── client.py
├── key.pem
├── requirements.txt
└── server.py
Running the Application
Run Server
Open a terminal, go to the project directory, activate the Python virtual environment, and then run the following command:
1
python server.py
Run Client
Open another terminal, go to the same directory, activate the Python virtual environment, and then run the following command:
1
python client.py